with just a tiny little healthy twist... naturally... i ve got to be able to give myself an excuse for indulging in these babies
as autumn was suddenly right on our doorstep, there was no way i could deny my urge to bake these cookies, and chocolate definitely had to be the main ingredient.
i do have a little recipe i always turn to, but this time i wanted a double whammy, chocolate cookie dough AND chocolate chips... ofcourse there s dozens of recipes out there, but this one jumped out at me screaming (not quite Halloween yet, but still, it was screaming) to be tested. whose better then to try out than Ms Nigella Lawson s big cookies.
so that s exactly what i did:
and they came out as she promised, but there was something a little overpowering about them, pure chocolate in the dough, pure chocolate chips (and loads of them) mixed in, you really need a huge glass of cold milk or a good mug of something hot and sweet to counterbalance that.
then i thought i might just want to add a little bit more sweetness, not by adding sugar, but using the bittersweet chocolate only in the dough, and exchanging white and milk chocolate chips for the pure ones, then adding pine-nuts and dried cranberries for the 'health' kick... plus an extra soon-to-be-not-so-secret ingredient...
wow, if i may say so myself, these turned out to be the best ever chocolate chips cookies i d ever made (i probably need to have a go at a few other recipes before i should be saying this, but hey, when a cookie is good, a cookie is good)
here s my recipe:
INGREDIENTS:
125 grams dark chocolate
150 grams plain flour
30 grams cocoa powder, sieved (not the drinking chocolate kind thingy)
1 teaspoon baking soda
1/2 teaspoon salt
125 grams unsalted butter, softened
125 grams light brown sugar
1 medium sized egg
1 heaped tablespoon full-fat cream cheese (yes, the secret ingredient)
45 grams milk chocolate chips, or a bar cut into little chunks
125 grams white chocolate chips, or a bar cut into little chunks
100 grams dried cranberries
80 grams pine-nuts
METHOD:
1. preheat the oven to 170°C
2. melt the 125 grams of dark chocolate au-bain-Marie
3. mix the flour, cocoa powder, baking soda and salt in a bowl
4. cream the butter and sugar in another bowl
5. add the slightly cooled melted chocolate to the creamed butter and sugar, and mix well
6. beat in the egg and the cream cheese
7. mix in the dry ingredients and lastly add the chocolate chips, cranberries and pine-nuts, and mix to distribute all ingredients evenly
8. using an icecream scoop, place equal mounds of the dough on a lined baking sheet. do not flatten the mounds and leave enough space in-between because they will spread a little. i scooped 6 per tray and got 21 cookies out of the one recipe, although Nigella says she gets only 12 cookies; she must have a huge icecream scoop! bake for 17 minutes.
9. once baked, leave to cool slightly and then transfer the cookies to a wire rack to cool completely before storing in airtight container, or gobble up one or two immediately
ok... yumm....

aka Homecooked by Aizi... juggling work, hobbies and cooking, but enjoying every minute (or that s what i tell myself)
Showing posts with label cakes n cookies. Show all posts
October 20, 2013
January 1, 2013
sweet things to start with... 2013
Happy New Year of the Snake everybody!
this year should be a good one, at least, if my horoscope is to be believed, this year of the snake, my Chinese (or should i say Japanese) sign is supposed to bring me luck.
well, i hope so, i could use some. after all the little mishaps we ve had thrown at us at the end of last year... and it has not stopped raining, but there are openings in the clouds and there is some blue sky visible now! a-HA!
to kick off this 'lucky' year, i ve been asked to post two recipes of sweet things my mom-in-law made for Christmas 2012. one s a doddle to make, the other requires a little bit more work, but both were delish! i m telling you, at 77, my mom-in-law is still going strong and loves to bake up a storm! she s an inspiration.
so here they are, a quick lemon cheesecake and a chocolate bûche de Noël:
QUICK LEMON CHEESECAKE
(inspired by Mary Berry in the BBC GOOD FOOD MAGAZINE February 2004)
INGREDIENTS:
for the biscuit base:
75 gr digestive biscuits
40 gr butter
25 gr demerara sugar
for the cheesecake filling:
200 gr low-fat cream cheese (Philadelphia light is a good one)
397 gr condensed milk
150 ml double cream
the grated zest and juice of 3 lemons
METHOD:
1. crush the biscuits; using a freezer bag and a rolling pin is a good idea
2. melt the butter, add the sugar and biscuits crumbs and mix well
3. using the back of a spoon, push the biscuit mixture evenly into a 20cm loose-bottomed non-stick cake tin and put in the fridge to set
4. soften the cream cheese in a bowl and beat in the condensed milk until smooth
5. stir in the cream
6. mix in the zest and the juice of the lemons
7. pour on top of the biscuit base and smooth out
8. chill in the fridge, preferably overnight
9. to serve, slide a palette knife along the side to loosen the cake, lift up the bottom and slide the cake out of the tin onto a flat dish. decorate with sugared lemon slices or any fruit in season.
you d think the condensed milk might be too sweet, but the lemon juice counteracts this and there s a very good balance between sweet and tart... scrumptious!
now for the bûche...
BÛCHE DE NOËL
INGREDIENTS:
for the Swiss roll:
5 eggs
140 gr light muscovado sugar
100 gr self-raising flour
25 gr pure cocoa-powder
for the chocolate ganache:
80 gr evaporated milk
120 gr pure (bittersweet) chocolate pieces
METHOD:
1. pre-heat the oven to 190°C
2. butter the base and side of a 30x35 cm Swiss roll tin and line the base with baking parchment
3. separate the eggs
4. whisk the egg yolks with 2 tablespoons of water and the sugar for about five minutes until light and creamy 5. sift in the flour and the cocoa powder and gently fold in until just blended (so as to keep it light and airy) and no lumps remain
6. beat the egg-whites until stiff and add to the cake mixture in three batches, folding in gently every time, again so as not to lose any airiness)
7. pour the mixture into the prepared tin, bake for 10-12 minutes until just firm to the touch
8. leave to cool before turning out onto a tea-towel which has been dusted with icing sugar... then follow Mary Berry s technique for rolling it up: (the recipe she uses here is a bit different because it uses no flour, but the rolling up is the same)
Great British Bake Off - masterclass
9. for the ganache, simply melt the chocolate pieces into warmed evaporated milk until thickened... it may turn out quite thick when cool, but can always be re-heated until malleable for spreading out onto the cake and for decorating the roulade later.
10. to make the Yule log, cut off a piece of the roulade at an angle and place against the main roll, then spread over the ganache and use a fork to shape the 'bark'... decorate with icing sugar 'snow' and eventually some Christmassy ornaments.
for the filling you could use whipped cream instead, or add crushed nuts and dried red fruit, but surprisingly, the chocolate ganache is not too heavy and does work.
and you don t need to make it into a log (because that s pretty typical for Christmas). whipped cream and strawberries, for example, make it a pretty good dessert for early summer too...
so, here you go, two sweet recipes to start off this 2013. hope the year brings all you may wish for.
this year should be a good one, at least, if my horoscope is to be believed, this year of the snake, my Chinese (or should i say Japanese) sign is supposed to bring me luck.
well, i hope so, i could use some. after all the little mishaps we ve had thrown at us at the end of last year... and it has not stopped raining, but there are openings in the clouds and there is some blue sky visible now! a-HA!
to kick off this 'lucky' year, i ve been asked to post two recipes of sweet things my mom-in-law made for Christmas 2012. one s a doddle to make, the other requires a little bit more work, but both were delish! i m telling you, at 77, my mom-in-law is still going strong and loves to bake up a storm! she s an inspiration.
so here they are, a quick lemon cheesecake and a chocolate bûche de Noël:
QUICK LEMON CHEESECAKE
(inspired by Mary Berry in the BBC GOOD FOOD MAGAZINE February 2004)
INGREDIENTS:
for the biscuit base:
75 gr digestive biscuits
40 gr butter
25 gr demerara sugar
for the cheesecake filling:
200 gr low-fat cream cheese (Philadelphia light is a good one)
397 gr condensed milk
150 ml double cream
the grated zest and juice of 3 lemons
METHOD:
1. crush the biscuits; using a freezer bag and a rolling pin is a good idea
2. melt the butter, add the sugar and biscuits crumbs and mix well
3. using the back of a spoon, push the biscuit mixture evenly into a 20cm loose-bottomed non-stick cake tin and put in the fridge to set
4. soften the cream cheese in a bowl and beat in the condensed milk until smooth
5. stir in the cream
6. mix in the zest and the juice of the lemons
7. pour on top of the biscuit base and smooth out
8. chill in the fridge, preferably overnight
9. to serve, slide a palette knife along the side to loosen the cake, lift up the bottom and slide the cake out of the tin onto a flat dish. decorate with sugared lemon slices or any fruit in season.
you d think the condensed milk might be too sweet, but the lemon juice counteracts this and there s a very good balance between sweet and tart... scrumptious!
now for the bûche...
BÛCHE DE NOËL
INGREDIENTS:
for the Swiss roll:
5 eggs
140 gr light muscovado sugar
100 gr self-raising flour
25 gr pure cocoa-powder
for the chocolate ganache:
80 gr evaporated milk
120 gr pure (bittersweet) chocolate pieces
METHOD:
1. pre-heat the oven to 190°C
2. butter the base and side of a 30x35 cm Swiss roll tin and line the base with baking parchment
3. separate the eggs
4. whisk the egg yolks with 2 tablespoons of water and the sugar for about five minutes until light and creamy 5. sift in the flour and the cocoa powder and gently fold in until just blended (so as to keep it light and airy) and no lumps remain
6. beat the egg-whites until stiff and add to the cake mixture in three batches, folding in gently every time, again so as not to lose any airiness)
7. pour the mixture into the prepared tin, bake for 10-12 minutes until just firm to the touch
8. leave to cool before turning out onto a tea-towel which has been dusted with icing sugar... then follow Mary Berry s technique for rolling it up: (the recipe she uses here is a bit different because it uses no flour, but the rolling up is the same)
Great British Bake Off - masterclass
9. for the ganache, simply melt the chocolate pieces into warmed evaporated milk until thickened... it may turn out quite thick when cool, but can always be re-heated until malleable for spreading out onto the cake and for decorating the roulade later.
10. to make the Yule log, cut off a piece of the roulade at an angle and place against the main roll, then spread over the ganache and use a fork to shape the 'bark'... decorate with icing sugar 'snow' and eventually some Christmassy ornaments.
for the filling you could use whipped cream instead, or add crushed nuts and dried red fruit, but surprisingly, the chocolate ganache is not too heavy and does work.
and you don t need to make it into a log (because that s pretty typical for Christmas). whipped cream and strawberries, for example, make it a pretty good dessert for early summer too...
so, here you go, two sweet recipes to start off this 2013. hope the year brings all you may wish for.
May 1, 2012
flapjacks etcetera
what s it been? thirty years or perhaps a little more when i first made these?
flapjacks.
always thought it a funny name, because these cookies (if they are cookies) don t flap, and i can t imagine where the jack came from, but that s what they re called...
oats are not easy to find here, well, actually, if you look, ofcourse you ll find them, but most are prepared so as to make an easy and quick porridge and that s not what i needed. on a visit to Ghent though, in a very quirky store called Vits-Staelens, i found some good oats and immediately thought of making flapjacks.
sweet, buttery, chewy yet crunchy... hmmm. and i did have golden syrup in my pantry, and butter, so i got started:
FLAPJACKS
INGREDIENTS:
125 gr softened unsalted butter
25 gr fine caster sugar
150 gr golden syrup
225 gr rolled oats pinch of salt
METHOD:
1. butter and line a 24x24 cm baking tin with baking parchment (please do line the tin, i didn t and had a little disaster getting the flapjacks out! but more on that later)
2. preheat the oven to 180°C
3. cream the butter and sugar together until fluffy, light and pale.
4. mix in the syrup, oats and salt
5. spread evenly into prepared tin
6. bake until deep golden (my recipe said 40 minutes, but that s far too long, just keep an eye on the color, don t let it get burnt)
7. while still warm, cut into 16 squares and leave to cool completely in the tin before lifting the baking paper up and out
8. these keep quite well in an airtight cookie jar
i mentioned that about lining the baking tin with parchment, didn t i? it s because just buttering the tin is definitely not enough! after cooling i could not get some flapjacks out in one piece, no matter how carefully i tried... so i had a flapjack crumble!
no way i was going to waste that... and this morning i baked us some apple muffins using my earlier recipe and sprinkling some flapjack crumble on the top before baking...
they came out pretty good, don t you think?
still have a little left over, maybe i can incorparate that into some cookies... with extra nuts and chocolate chips?
flapjacks.
always thought it a funny name, because these cookies (if they are cookies) don t flap, and i can t imagine where the jack came from, but that s what they re called...
oats are not easy to find here, well, actually, if you look, ofcourse you ll find them, but most are prepared so as to make an easy and quick porridge and that s not what i needed. on a visit to Ghent though, in a very quirky store called Vits-Staelens, i found some good oats and immediately thought of making flapjacks.
sweet, buttery, chewy yet crunchy... hmmm. and i did have golden syrup in my pantry, and butter, so i got started:
FLAPJACKS
INGREDIENTS:
125 gr softened unsalted butter
25 gr fine caster sugar
150 gr golden syrup
225 gr rolled oats pinch of salt
METHOD:
1. butter and line a 24x24 cm baking tin with baking parchment (please do line the tin, i didn t and had a little disaster getting the flapjacks out! but more on that later)
2. preheat the oven to 180°C
3. cream the butter and sugar together until fluffy, light and pale.
4. mix in the syrup, oats and salt
5. spread evenly into prepared tin
6. bake until deep golden (my recipe said 40 minutes, but that s far too long, just keep an eye on the color, don t let it get burnt)
7. while still warm, cut into 16 squares and leave to cool completely in the tin before lifting the baking paper up and out
8. these keep quite well in an airtight cookie jar
i mentioned that about lining the baking tin with parchment, didn t i? it s because just buttering the tin is definitely not enough! after cooling i could not get some flapjacks out in one piece, no matter how carefully i tried... so i had a flapjack crumble!
no way i was going to waste that... and this morning i baked us some apple muffins using my earlier recipe and sprinkling some flapjack crumble on the top before baking...
they came out pretty good, don t you think?
still have a little left over, maybe i can incorparate that into some cookies... with extra nuts and chocolate chips?
April 9, 2012
the easiest ever muffin recipe
do you have five minutes to spare? just to read this?
and perhaps 30 minutes extra? to whip up the easiest ever muffins?
okay, okay. i guess cupcakes are just that little bit more refined. but sometimes you just haven t got the time to beat butter and sugar together until fluffy in order to slowly mix in sieved flour etc...
a muffin can be just as sweet and satisfying as a cupcake, with a lot let hassle, and without the creamy frosting when sometimes that can just be a tad too much.
you don t even need a mixer, just a fork is fine, seriously.
here s my basic recipe:
DRY INGREDIENTS:
250 gr self-raising flour
125 gr fine white (or unrefined) caster sugar
1 teaspoon baking powder, optional
1 pinch of salt
WET INGREDIENTS:
125 ml milk
1 large egg
50 ml sunflower of rapeseed oil
mixed together
preheat the oven to 180°C.
sieve the dry ingredients into a bowl.
add milk/egg/oil mixture and slowly mix with a fork until everything is pretty well incorporated but DO NOT OVERBEAT!
divide into prepared muffin/cupcake tin (this recipe makes just enough for 12 muffins) and bake for about 20 minutes.
easy.
then play around.
like i did today: instead of 125 ml milk, i used half coconut milk and half plain milk. i also added 1 tablespoon of freeze-dried yuzu flakes to the flour mixture. and to top it all off, i added 125 gr of fresh blueberries.
just half an hour, a bowl, and a fork...
oh, yes, there is that little bit of washing up to do... but that s fine when you can have a cup of tea with a warm muffin afterwards, don t you agree?
and perhaps 30 minutes extra? to whip up the easiest ever muffins?
okay, okay. i guess cupcakes are just that little bit more refined. but sometimes you just haven t got the time to beat butter and sugar together until fluffy in order to slowly mix in sieved flour etc...
a muffin can be just as sweet and satisfying as a cupcake, with a lot let hassle, and without the creamy frosting when sometimes that can just be a tad too much.
you don t even need a mixer, just a fork is fine, seriously.
here s my basic recipe:
DRY INGREDIENTS:
250 gr self-raising flour
125 gr fine white (or unrefined) caster sugar
1 teaspoon baking powder, optional
1 pinch of salt
WET INGREDIENTS:
125 ml milk
1 large egg
50 ml sunflower of rapeseed oil
mixed together
preheat the oven to 180°C.
sieve the dry ingredients into a bowl.
add milk/egg/oil mixture and slowly mix with a fork until everything is pretty well incorporated but DO NOT OVERBEAT!
divide into prepared muffin/cupcake tin (this recipe makes just enough for 12 muffins) and bake for about 20 minutes.
easy.
then play around.
like i did today: instead of 125 ml milk, i used half coconut milk and half plain milk. i also added 1 tablespoon of freeze-dried yuzu flakes to the flour mixture. and to top it all off, i added 125 gr of fresh blueberries.
just half an hour, a bowl, and a fork...
oh, yes, there is that little bit of washing up to do... but that s fine when you can have a cup of tea with a warm muffin afterwards, don t you agree?
March 11, 2012
with a little nod to autumn... while spring is almost here
it s that time of year again, spring is nearly here...
and i m still into my cookie-making mode, although i ve been kept busy with my other endeavors, i just can t help needing to make a batch regularly.
my son had recently asked me to make him a bracelet with some wooden beads and leather. which i did. then posted on FB and apparently the son of one of my friends (who lives in Canada) liked the look of it, so i made him one too... and sent it over.
so my friend asked me whether i would like something from there, and i jumped at the chance (who wouldn t?) of asking her whether she could find me some maple leaf cookie cutters...
she did!
and i received them yesterday! YAY!
ofcourse i couldn t not make maple syrup cookies. even tho i should be baking cherry-blossom flavored ones or more 'spring'-like thingies... oh well, still have time for that!
i had never made these before, but i found a smashing recipe on the Smitten Kitchen blog and this really worked a treat (click on recipe and you will be linked to the post where you ll find all details).
i m just going to show you how delectable they are!
oh, yes, i used grade C maple syrup here, just because i didn t have anything else, and i think it really tastes best of all...
thank you Y! big maply hug!
and i m still into my cookie-making mode, although i ve been kept busy with my other endeavors, i just can t help needing to make a batch regularly.
my son had recently asked me to make him a bracelet with some wooden beads and leather. which i did. then posted on FB and apparently the son of one of my friends (who lives in Canada) liked the look of it, so i made him one too... and sent it over.
so my friend asked me whether i would like something from there, and i jumped at the chance (who wouldn t?) of asking her whether she could find me some maple leaf cookie cutters...
she did!
and i received them yesterday! YAY!
ofcourse i couldn t not make maple syrup cookies. even tho i should be baking cherry-blossom flavored ones or more 'spring'-like thingies... oh well, still have time for that!
i had never made these before, but i found a smashing recipe on the Smitten Kitchen blog and this really worked a treat (click on recipe and you will be linked to the post where you ll find all details).
i m just going to show you how delectable they are!
oh, yes, i used grade C maple syrup here, just because i didn t have anything else, and i think it really tastes best of all...
thank you Y! big maply hug!
February 9, 2012
arigatou! na-go-mi!
after so many years back in Belgium, i have finally, finally found the courage to drive around in Brussels and look for that Japanese store i always knew was there (believe me, for driving around in, Brussels is a crazy city, sorry if i m offending anyone, but secretly, you agree with me).
to be fair, the past few years have seen a remarkable rise in Japanese and Korean produce being sold here in the Chinese supermarkets, but it s not quite the same.
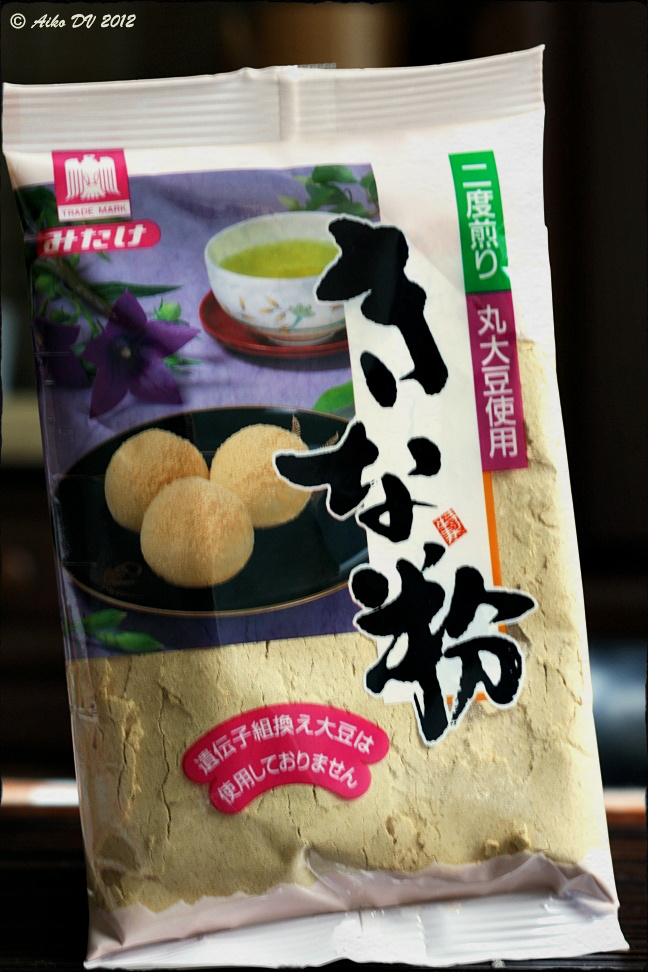
i mean, where was i going to find kinako? i had never ever seen it here. sure, soy sauce, nori, gari, sushi-vinegar... what with the upcoming trend for making sushi at home now, but something so typical and mostly used in a Japanese dessert? nah...
so imagine my delight when i found that, and so many other flavors of my childhood at Nagomi Superstore...
and they had kinako!
and loads more, among which another of my favorite flavorings; yuzu!
guess which is the odd one out...*
and OMG, yuuuumm! (oh, to be 10 again!)(this Peko-chan box contains little balls of milky sweetness for those not in the know)
now, once home, i just had to make some warabimochi (mochi rolled in sweetened kinako), but since i had a birthday coming up and it s traditional to treat friends and colleagues to something, i thought i might make some kinako-cookies.
here s how i did it:
KINAKO-COOKIES
INGREDIENTS:
170 gr all-purpose flour
40 gr kinako
1/4 teaspoon baking powder
pinch of salt
115 gr butter, softened
60 gr fine white sugar
55 gr soft brown sugar
1 egg
1 tablespoon milk
drop of vanilla extract
METHOD:
1. sieve the flour, the kinako, baking powder, salt together into a bowl
2. beat the softened butter and the sugars together until light and fluffy
3. mix the egg, milk and vanilla into the butter/sugar mixture
4. slowly add the dry ingredients until quite a soft dough
5. wrap in cling-film and leave in the fridge to set (about an hour)
6. meanwhile, pre-heat the oven to 190°C and line some cookie trays with baking paper
7. roll out the dough on a floured surface to about 3 mm thick and cut out shapes with your favorite cookie cutter
8. bake for about 8-10 minutes until just browned, be careful not to crowd the baking sheet, as they do spread a little
9. leave to cool completely before tucking in...
unless you can t wait ofcourse
*odd one out is a jar of umeboshi (which i just love with some white rice)
to be fair, the past few years have seen a remarkable rise in Japanese and Korean produce being sold here in the Chinese supermarkets, but it s not quite the same.
i mean, where was i going to find kinako? i had never ever seen it here. sure, soy sauce, nori, gari, sushi-vinegar... what with the upcoming trend for making sushi at home now, but something so typical and mostly used in a Japanese dessert? nah...
so imagine my delight when i found that, and so many other flavors of my childhood at Nagomi Superstore...
and they had kinako!
and loads more, among which another of my favorite flavorings; yuzu!
guess which is the odd one out...*
and OMG, yuuuumm! (oh, to be 10 again!)(this Peko-chan box contains little balls of milky sweetness for those not in the know)
now, once home, i just had to make some warabimochi (mochi rolled in sweetened kinako), but since i had a birthday coming up and it s traditional to treat friends and colleagues to something, i thought i might make some kinako-cookies.
here s how i did it:
KINAKO-COOKIES
INGREDIENTS:
170 gr all-purpose flour
40 gr kinako
1/4 teaspoon baking powder
pinch of salt
115 gr butter, softened
60 gr fine white sugar
55 gr soft brown sugar
1 egg
1 tablespoon milk
drop of vanilla extract
METHOD:
1. sieve the flour, the kinako, baking powder, salt together into a bowl
2. beat the softened butter and the sugars together until light and fluffy
3. mix the egg, milk and vanilla into the butter/sugar mixture
4. slowly add the dry ingredients until quite a soft dough
5. wrap in cling-film and leave in the fridge to set (about an hour)
6. meanwhile, pre-heat the oven to 190°C and line some cookie trays with baking paper
7. roll out the dough on a floured surface to about 3 mm thick and cut out shapes with your favorite cookie cutter
8. bake for about 8-10 minutes until just browned, be careful not to crowd the baking sheet, as they do spread a little
9. leave to cool completely before tucking in...
unless you can t wait ofcourse
*odd one out is a jar of umeboshi (which i just love with some white rice)
January 9, 2012
masala chai cake my way
yesterday there was that little disaster with the oven temperature while baking that buttermilk apple cake with cardamom...
today i was determined to make good that dumb mistake.
and here it is, my masala chai cake (also with a hint of cardamom ofcourse)
already looks so much better, doesn t it?
and even though that apple cake tasted quite alright, it was a bit on the stodgy side to be honest.
so i adapted and tweaked and here s my own recipe:
MASALA CHAI CAKE WITH CARDAMOM
INGREDIENTS:
180 gr unsalted butter
200 gr fine white caster sugar
3 whole eggs
220 gr plain flour
1/2 teaspoon baking powder
1/2 teaspoon baking soda
pinch of salt
1/2 teaspoon freshly ground cardamom seeds
3 teabags masala chai
60 ml boiling water
100 ml buttermilk
drop of vanilla extract
METHOD:
1. preheat the oven to 175°C and prepare a cake tin
2. pour the boiling water on the teabags and leave to infuse for 30 minutes or until cold
3. heat the butter in the microwave for about 20 seconds until slightly melted and then beat in the sugar (to my surprise this actually makes it so much easier to get that light pale fluffy creaminess they always talk about in recipe books)
4. add the eggs one by one and beat in well
5. sieve the flour, baking powder, baking soda and ground cardamom in stages into the butter/sugar/egg mixture and mix in well
6. add the buttermilk, masala chai concentrate (the infused tea), and a drop of vanilla extract, beat in well
7. pour into the prepared cake tin and bake for about 50 minutes until golden and springy to the touch or until a wooden skewer inserted in the middle comes out clean
8. leave to cool in the tin for about 10 minutes before taking it out to cool completely
now that s what i call a perfect cake; light, not too sweet, and just moist enough. good on it s own, but probably even better with a little bit of whipped cream, and definitely best with a cup of steaming hot masala chai on a winter afternoon.
well... at least i got it right this time... phew!
today i was determined to make good that dumb mistake.
and here it is, my masala chai cake (also with a hint of cardamom ofcourse)
already looks so much better, doesn t it?
and even though that apple cake tasted quite alright, it was a bit on the stodgy side to be honest.
so i adapted and tweaked and here s my own recipe:
MASALA CHAI CAKE WITH CARDAMOM
INGREDIENTS:
180 gr unsalted butter
200 gr fine white caster sugar
3 whole eggs
220 gr plain flour
1/2 teaspoon baking powder
1/2 teaspoon baking soda
pinch of salt
1/2 teaspoon freshly ground cardamom seeds
3 teabags masala chai
60 ml boiling water
100 ml buttermilk
drop of vanilla extract
METHOD:
1. preheat the oven to 175°C and prepare a cake tin
2. pour the boiling water on the teabags and leave to infuse for 30 minutes or until cold
3. heat the butter in the microwave for about 20 seconds until slightly melted and then beat in the sugar (to my surprise this actually makes it so much easier to get that light pale fluffy creaminess they always talk about in recipe books)
4. add the eggs one by one and beat in well
5. sieve the flour, baking powder, baking soda and ground cardamom in stages into the butter/sugar/egg mixture and mix in well
6. add the buttermilk, masala chai concentrate (the infused tea), and a drop of vanilla extract, beat in well
7. pour into the prepared cake tin and bake for about 50 minutes until golden and springy to the touch or until a wooden skewer inserted in the middle comes out clean
8. leave to cool in the tin for about 10 minutes before taking it out to cool completely
now that s what i call a perfect cake; light, not too sweet, and just moist enough. good on it s own, but probably even better with a little bit of whipped cream, and definitely best with a cup of steaming hot masala chai on a winter afternoon.
well... at least i got it right this time... phew!
January 8, 2012
there s chocolate, and then there s cardamom
for Christmas, i received the Hummingbird Bakery Cake Days cookery, well baking actually, book from my son. as you can imagine, i was over the moon and decided to make their malted chocolate cupcakes as a dessert for New Year s Eve dinner.
they so worked a treat, and although i sometimes find that instructions in cookery books can be faulty, this one delivered!
see?
and then i caught a cold... and have been sniffling for the past week. and Sam caught it too. so we ve been sniffling together.
the stormy weather didn t help either.
yesterday though, we were so tired of being cooped up inside, that we went on a day-trip to Zeeland, hoping to get our colds driven out by the stiff breeze of the Oosterschelde.
it worked... well, a little.
this morning i woke up determined to make a cake from the first Hummingbird Bakery book (because of course i couldn t wait for my next birthday to come along so i could get that as a gift again... and i d went and bought this one, he he he...)
thinking i might as well use up the buttermilk i d used in the cupcakes, i wanted to make a simple buttermilk cake.
nothing easier than a simple cake, right?
wrong!
there was nothing wrong with the recipe. nothing at all. it made for a lighter batter, and even said that i could add fruits or nuts and it would work. i had some apples left so i thought i might add those, and i have something with cardamom these days.
however, i guess my cold was still influencing my judgment, and it was still pretty early this morning (as if that s an excuse) but i pre-heated the oven to 130°C instead of 170°C!?!
stupid, stupid, stupid...
it was only after 50 minutes, way over the time suggested in the book, that i realized the cake was not rising properly, and then i noticed the temperature knob of the oven was turned too low!
aaargh!
could i rescue this one?
not quite, as you can see here
sunk quite a bit, huh?
but it tastes great, and i m thinking it s the cardamom. there s something about cardamom that saves the day anytime. that little bit of the exotic, that little hint of something elusive, i love it.
and it works in this cake, even though it doesn t quite look the part (it actually really looks like a cake i would ve baked way back when, ha ha)
BUTTERMILK CAKE with APPLES, CINNAMON AND CARDAMOM
(adapted from the Hummingbird Bakery Cookbook)
INGREDIENTS:
120 gr butter, softened
330 gr fine white caster sugar
3 whole eggs
200 gr plain flour
1/2 teaspoon baking soda
1/2 teaspoon salt
120 ml buttermilk
1/4 teaspoon vanilla extract
1 large apple, cut into smallish pieces
1/2 teaspoon freshly ground cardamom seeds
1/2 teaspoon ground cinnamon
METHOD:
1. preheat the oven to 170°C (NOT 130°C!!!) and prepare a loaf tin of 13x23cm by either lining with baking parchment or buttering and flouring
2. beat the butter and sugar together until light and pale
3. add the eggs one by one and beat in well
4. sieve the flour together with the baking soda, salt, cardamom and cinnamon
5. add the flour mixture to the butter/sugar/egg mixture alternating with the buttermilk
6. mix in well
7. flour the apple pieces and fold into the batter
8. pour the cake mixture into your tin and bake for about 35-40 minutes or until the center is springy to the touch. for extra certainty you might want to insert a wooden skewer in the middle and if that comes out clean, your cake is done
9. leave to cool in the tin for about ten minutes and then turn out to cool completely on a rack
next time, i promise, this one will come out PURR-fect!
they so worked a treat, and although i sometimes find that instructions in cookery books can be faulty, this one delivered!
see?
and then i caught a cold... and have been sniffling for the past week. and Sam caught it too. so we ve been sniffling together.
the stormy weather didn t help either.
yesterday though, we were so tired of being cooped up inside, that we went on a day-trip to Zeeland, hoping to get our colds driven out by the stiff breeze of the Oosterschelde.
it worked... well, a little.
this morning i woke up determined to make a cake from the first Hummingbird Bakery book (because of course i couldn t wait for my next birthday to come along so i could get that as a gift again... and i d went and bought this one, he he he...)
thinking i might as well use up the buttermilk i d used in the cupcakes, i wanted to make a simple buttermilk cake.
nothing easier than a simple cake, right?
wrong!
there was nothing wrong with the recipe. nothing at all. it made for a lighter batter, and even said that i could add fruits or nuts and it would work. i had some apples left so i thought i might add those, and i have something with cardamom these days.
however, i guess my cold was still influencing my judgment, and it was still pretty early this morning (as if that s an excuse) but i pre-heated the oven to 130°C instead of 170°C!?!
stupid, stupid, stupid...
it was only after 50 minutes, way over the time suggested in the book, that i realized the cake was not rising properly, and then i noticed the temperature knob of the oven was turned too low!
aaargh!
could i rescue this one?
not quite, as you can see here
sunk quite a bit, huh?
but it tastes great, and i m thinking it s the cardamom. there s something about cardamom that saves the day anytime. that little bit of the exotic, that little hint of something elusive, i love it.
and it works in this cake, even though it doesn t quite look the part (it actually really looks like a cake i would ve baked way back when, ha ha)
BUTTERMILK CAKE with APPLES, CINNAMON AND CARDAMOM
(adapted from the Hummingbird Bakery Cookbook)
INGREDIENTS:
120 gr butter, softened
330 gr fine white caster sugar
3 whole eggs
200 gr plain flour
1/2 teaspoon baking soda
1/2 teaspoon salt
120 ml buttermilk
1/4 teaspoon vanilla extract
1 large apple, cut into smallish pieces
1/2 teaspoon freshly ground cardamom seeds
1/2 teaspoon ground cinnamon
METHOD:
1. preheat the oven to 170°C (NOT 130°C!!!) and prepare a loaf tin of 13x23cm by either lining with baking parchment or buttering and flouring
2. beat the butter and sugar together until light and pale
3. add the eggs one by one and beat in well
4. sieve the flour together with the baking soda, salt, cardamom and cinnamon
5. add the flour mixture to the butter/sugar/egg mixture alternating with the buttermilk
6. mix in well
7. flour the apple pieces and fold into the batter
8. pour the cake mixture into your tin and bake for about 35-40 minutes or until the center is springy to the touch. for extra certainty you might want to insert a wooden skewer in the middle and if that comes out clean, your cake is done
9. leave to cool in the tin for about ten minutes and then turn out to cool completely on a rack
next time, i promise, this one will come out PURR-fect!
December 11, 2011
little cheesecake pots
the run-up to Christmas is hectic. even without kids, well, one kid who s now more out of the house than in... it s hectic.
making Christmas cards, buying gifts, decorating the house, deciding on a menu (although the past years it s been a yummy collaboration with my mom-in-law), well, you know how it is.
which is why this easy little sweet pot is such a joy to make, and to eat.
if you re a fan of cheesecakes, but don t want to make a whole cake and wait for it to cool until set, here s a solution:
LEMONY CHEESECAKE POTS WITH RASPBERRIES
INGREDIENTS:
100 gr digestive biscuits, crushed
30 gr butter, melted
300 gr Philadelphia cream cheese
3 tablespoons lemon curd
handful of fresh or frozen raspberries
1 tablespoon of sugar
METHOD:
1. mix the crushed bisuits with the melted butter and divide between little pots or ramekins (just to make a crust, as thin or as thick as you like) and leave to chill in the fridge until set
2. mix the cream cheese with the lemon curd and taste. adjust by either adding a little more lemon curd or sweeten with a little icing sugar
3. divide between the pots or ramekins and chill
4. heat the fresh or frozen raspberries with a little splash of water and the sugar until the fruit just collapses, leave to cool
5. when ready to serve, divide the raspberries between the pots and dive in ;-)
sweet and simple, but just that little bit indulgent, just enough to get one thru these crazy days.
in case i don t get to post before the end of this year, let me wish you a Merry Christmas and may 2012 bring you all you ever wanted, and above all, happy cooking days!
making Christmas cards, buying gifts, decorating the house, deciding on a menu (although the past years it s been a yummy collaboration with my mom-in-law), well, you know how it is.
which is why this easy little sweet pot is such a joy to make, and to eat.
if you re a fan of cheesecakes, but don t want to make a whole cake and wait for it to cool until set, here s a solution:
LEMONY CHEESECAKE POTS WITH RASPBERRIES
INGREDIENTS:
100 gr digestive biscuits, crushed
30 gr butter, melted
300 gr Philadelphia cream cheese
3 tablespoons lemon curd
handful of fresh or frozen raspberries
1 tablespoon of sugar
METHOD:
1. mix the crushed bisuits with the melted butter and divide between little pots or ramekins (just to make a crust, as thin or as thick as you like) and leave to chill in the fridge until set
2. mix the cream cheese with the lemon curd and taste. adjust by either adding a little more lemon curd or sweeten with a little icing sugar
3. divide between the pots or ramekins and chill
4. heat the fresh or frozen raspberries with a little splash of water and the sugar until the fruit just collapses, leave to cool
5. when ready to serve, divide the raspberries between the pots and dive in ;-)
sweet and simple, but just that little bit indulgent, just enough to get one thru these crazy days.
in case i don t get to post before the end of this year, let me wish you a Merry Christmas and may 2012 bring you all you ever wanted, and above all, happy cooking days!
October 31, 2011
'all-hallows-even'
the day has come, the one moment in the year when the physical and the supernatural worlds are supposed to be closest and magical things can happen...
every living thing (this side of the equator) is preparing for winter.
but today there will be just a little celebration before the quiet.
with some of the season s bounty.
(of which i had two left... yes, well)
APPLE CINNAMON AND GINGER MUFFINS
INGREDIENTS
250 gr self-raising flour
125 gr golden caster sugar
1 tablespoon baking powder
1/4 teaspoon sea-salt
1 teaspoon ground cinnamon
1 teaspoon ground dried ginger
130 ml milk
50 ml rapeseed (canola) oil, or sunflower oil
1 large free-range egg
1 medium eating apple, peeled, cored, cut into smallish chunks
2 tablespoons of coarse sugar mixed with a teaspoon of ground cinnamon
METHOD
1. prepare a 12-cup muffin tin by lining with paper cups and heat the oven to 180°C
2. sieve the dry ingredients into a large bowl
3. beat the wet ingredients together and mix in with the dry, combine, but do not overmix
4. add the apple pieces and mix gently
5. divide the batter into the prepared tin, it should be just enough to fill all 12 cups
6. sprinkle with the cinnamon-sugar
7. bake for about 15 minutes or until a wooden skewer stuck in the middle comes out clean
7. leave to cool on a wire rack, but lukewarm these are also very nice, (i like mine with a cup of coffee)
meanwhile, we ve gone back to 'winter-time', the clocks have been set back an hour, and the evenings close in a lot earlier now.
that meant we needed to take advantage of this day and enjoy some of the final flourishes of nature.
ginkgo... (their fruit really do NOT smell nice, but the nuts are a delicacy)
red agapanthus still in bloom
magnolia seeds ready to pop (aren t these the strangest sight?)
and an old-fashioned little geranium...
there s been a freak snow-storm in the east coast of the States, it s absurdly warm over here for the time of year, down under they re preparing for summer...
but it s a magical time, a hallowed time, stay safe everyone... boooooooh!
happy halloween!
every living thing (this side of the equator) is preparing for winter.
but today there will be just a little celebration before the quiet.
with some of the season s bounty.
(of which i had two left... yes, well)
APPLE CINNAMON AND GINGER MUFFINS
INGREDIENTS
250 gr self-raising flour
125 gr golden caster sugar
1 tablespoon baking powder
1/4 teaspoon sea-salt
1 teaspoon ground cinnamon
1 teaspoon ground dried ginger
130 ml milk
50 ml rapeseed (canola) oil, or sunflower oil
1 large free-range egg
1 medium eating apple, peeled, cored, cut into smallish chunks
2 tablespoons of coarse sugar mixed with a teaspoon of ground cinnamon
METHOD
1. prepare a 12-cup muffin tin by lining with paper cups and heat the oven to 180°C
2. sieve the dry ingredients into a large bowl
3. beat the wet ingredients together and mix in with the dry, combine, but do not overmix
4. add the apple pieces and mix gently
5. divide the batter into the prepared tin, it should be just enough to fill all 12 cups
6. sprinkle with the cinnamon-sugar
7. bake for about 15 minutes or until a wooden skewer stuck in the middle comes out clean
7. leave to cool on a wire rack, but lukewarm these are also very nice, (i like mine with a cup of coffee)
meanwhile, we ve gone back to 'winter-time', the clocks have been set back an hour, and the evenings close in a lot earlier now.
that meant we needed to take advantage of this day and enjoy some of the final flourishes of nature.
ginkgo... (their fruit really do NOT smell nice, but the nuts are a delicacy)
red agapanthus still in bloom
magnolia seeds ready to pop (aren t these the strangest sight?)
and an old-fashioned little geranium...
there s been a freak snow-storm in the east coast of the States, it s absurdly warm over here for the time of year, down under they re preparing for summer...
but it s a magical time, a hallowed time, stay safe everyone... boooooooh!
happy halloween!
September 24, 2011
those little signs of autumn
it s definitely here, the sun sits lower in the skies, the air smells faintly of a good wood fire being stoked to keep out the chill, the leaves are slowly turning and getting ready to provide us with a final spectacle of color, and the fruits of the season are at their best...
autumn.
apples and nuts, what better way to combine them with spices and sugar in a sticky yummy cake. being an avid fan of Delicious. magazine i was lucky to find a super recipe in the october 2011 issue to do just that. i did tweak it just a little bit. since i had no ground ginger, i substited by grating in some fresh ginger and just to make life easier, i used ground allspice berries which contain all those aromas of cloves and cinnamon and nutmeg.
so here it is:
STICKY APPLE PECAN AND GINGER CAKE
INGREDIENTS:
150 gr unsalted butter
150 gr soft dark brown muscovado sugar
150 gr golden syrup
200 ml milk
250 gr plain all-purpose flour
1.5 teaspoon ground allspice berries
2 cm piece of fresh ginger, grated
1.5 teaspoon baking powder
2 organic eggs, beaten
75 gr pecans, roughly chopped
2 pieces of candied stem ginger, chopped quite finely
2 crisp eating apples, peeled, cored and chopped into chunks
(about 250 gr when chopped)
METHOD:
1. preheat the oven to 180°C and prepare a 2 liter loaf tin (it really has to be this large because the cake does rise quite a bit) by greasing and lining with baking parchment
2. melt the butter, the sugar and syrup. once melted, add the milk and set aside to cool
3. sift the flour with the baking powder. add the ground allspice and the grated ginger
4. make a well in the center and slowly beat in the cooled sugar mixture
5. mix in the beaten eggs, chopped stem ginger, pecans and apple chunks
6. pour the mixture (it will be more fluid than a normal cake mix) into the prepared tin and bake in the oven for about 50 minutes or until a skewer inserted in the center comes out clean
7. cool in the tin for about 5 minutes and then lift out and leave to cool on a wire rack
8. can be served lukewarm or cold
9. once completely cooled, wrap in baking parchment and cling film and keep in an airtight tin for up to 5 days, the flavor will improve (or so it says in the magazine, but i doubt it ll survive that long!)
what can i say? i just had a slice with some cream mixed with a little bit of cream cheese... and it tastes of... well, all things nice like sugar and spice...
autumn.
autumn.
apples and nuts, what better way to combine them with spices and sugar in a sticky yummy cake. being an avid fan of Delicious. magazine i was lucky to find a super recipe in the october 2011 issue to do just that. i did tweak it just a little bit. since i had no ground ginger, i substited by grating in some fresh ginger and just to make life easier, i used ground allspice berries which contain all those aromas of cloves and cinnamon and nutmeg.
so here it is:
STICKY APPLE PECAN AND GINGER CAKE
INGREDIENTS:
150 gr unsalted butter
150 gr soft dark brown muscovado sugar
150 gr golden syrup
200 ml milk
250 gr plain all-purpose flour
1.5 teaspoon ground allspice berries
2 cm piece of fresh ginger, grated
1.5 teaspoon baking powder
2 organic eggs, beaten
75 gr pecans, roughly chopped
2 pieces of candied stem ginger, chopped quite finely
2 crisp eating apples, peeled, cored and chopped into chunks
(about 250 gr when chopped)
METHOD:
1. preheat the oven to 180°C and prepare a 2 liter loaf tin (it really has to be this large because the cake does rise quite a bit) by greasing and lining with baking parchment
2. melt the butter, the sugar and syrup. once melted, add the milk and set aside to cool
3. sift the flour with the baking powder. add the ground allspice and the grated ginger
4. make a well in the center and slowly beat in the cooled sugar mixture
5. mix in the beaten eggs, chopped stem ginger, pecans and apple chunks
6. pour the mixture (it will be more fluid than a normal cake mix) into the prepared tin and bake in the oven for about 50 minutes or until a skewer inserted in the center comes out clean
7. cool in the tin for about 5 minutes and then lift out and leave to cool on a wire rack
8. can be served lukewarm or cold
9. once completely cooled, wrap in baking parchment and cling film and keep in an airtight tin for up to 5 days, the flavor will improve (or so it says in the magazine, but i doubt it ll survive that long!)
what can i say? i just had a slice with some cream mixed with a little bit of cream cheese... and it tastes of... well, all things nice like sugar and spice...
autumn.
Subscribe to:
Posts (Atom)
.jpg)
.jpg)
.jpg)
.jpg)