for Christmas, i received the Hummingbird Bakery Cake Days cookery, well baking actually, book from my son. as you can imagine, i was over the moon and decided to make their malted chocolate cupcakes as a dessert for New Year s Eve dinner.
they so worked a treat, and although i sometimes find that instructions in cookery books can be faulty, this one delivered!
see?
and then i caught a cold... and have been sniffling for the past week. and Sam caught it too. so we ve been sniffling together.
the stormy weather didn t help either.
yesterday though, we were so tired of being cooped up inside, that we went on a day-trip to Zeeland, hoping to get our colds driven out by the stiff breeze of the Oosterschelde.
it worked... well, a little.
this morning i woke up determined to make a cake from the first Hummingbird Bakery book (because of course i couldn t wait for my next birthday to come along so i could get that as a gift again... and i d went and bought this one, he he he...)
thinking i might as well use up the buttermilk i d used in the cupcakes, i wanted to make a simple buttermilk cake.
nothing easier than a simple cake, right?
wrong!
there was nothing wrong with the recipe. nothing at all. it made for a lighter batter, and even said that i could add fruits or nuts and it would work. i had some apples left so i thought i might add those, and i have something with cardamom these days.
however, i guess my cold was still influencing my judgment, and it was still pretty early this morning (as if that s an excuse) but i pre-heated the oven to 130°C instead of 170°C!?!
stupid, stupid, stupid...
it was only after 50 minutes, way over the time suggested in the book, that i realized the cake was not rising properly, and then i noticed the temperature knob of the oven was turned too low!
aaargh!
could i rescue this one?
not quite, as you can see here
sunk quite a bit, huh?
but it tastes great, and i m thinking it s the cardamom. there s something about cardamom that saves the day anytime. that little bit of the exotic, that little hint of something elusive, i love it.
and it works in this cake, even though it doesn t quite look the part (it actually really looks like a cake i would ve baked way back when, ha ha)
BUTTERMILK CAKE with APPLES, CINNAMON AND CARDAMOM
(adapted from the Hummingbird Bakery Cookbook)
INGREDIENTS:
120 gr butter, softened
330 gr fine white caster sugar
3 whole eggs
200 gr plain flour
1/2 teaspoon baking soda
1/2 teaspoon salt
120 ml buttermilk
1/4 teaspoon vanilla extract
1 large apple, cut into smallish pieces
1/2 teaspoon freshly ground cardamom seeds
1/2 teaspoon ground cinnamon
METHOD:
1. preheat the oven to 170°C (NOT 130°C!!!) and prepare a loaf tin of 13x23cm by either lining with baking parchment or buttering and flouring
2. beat the butter and sugar together until light and pale
3. add the eggs one by one and beat in well
4. sieve the flour together with the baking soda, salt, cardamom and cinnamon
5. add the flour mixture to the butter/sugar/egg mixture alternating with the buttermilk
6. mix in well
7. flour the apple pieces and fold into the batter
8. pour the cake mixture into your tin and bake for about 35-40 minutes or until the center is springy to the touch. for extra certainty you might want to insert a wooden skewer in the middle and if that comes out clean, your cake is done
9. leave to cool in the tin for about ten minutes and then turn out to cool completely on a rack
next time, i promise, this one will come out PURR-fect!

aka Homecooked by Aizi... juggling work, hobbies and cooking, but enjoying every minute (or that s what i tell myself)
Showing posts with label dairy. Show all posts
January 8, 2012
December 11, 2011
little cheesecake pots
the run-up to Christmas is hectic. even without kids, well, one kid who s now more out of the house than in... it s hectic.
making Christmas cards, buying gifts, decorating the house, deciding on a menu (although the past years it s been a yummy collaboration with my mom-in-law), well, you know how it is.
which is why this easy little sweet pot is such a joy to make, and to eat.
if you re a fan of cheesecakes, but don t want to make a whole cake and wait for it to cool until set, here s a solution:
LEMONY CHEESECAKE POTS WITH RASPBERRIES
INGREDIENTS:
100 gr digestive biscuits, crushed
30 gr butter, melted
300 gr Philadelphia cream cheese
3 tablespoons lemon curd
handful of fresh or frozen raspberries
1 tablespoon of sugar
METHOD:
1. mix the crushed bisuits with the melted butter and divide between little pots or ramekins (just to make a crust, as thin or as thick as you like) and leave to chill in the fridge until set
2. mix the cream cheese with the lemon curd and taste. adjust by either adding a little more lemon curd or sweeten with a little icing sugar
3. divide between the pots or ramekins and chill
4. heat the fresh or frozen raspberries with a little splash of water and the sugar until the fruit just collapses, leave to cool
5. when ready to serve, divide the raspberries between the pots and dive in ;-)
sweet and simple, but just that little bit indulgent, just enough to get one thru these crazy days.
in case i don t get to post before the end of this year, let me wish you a Merry Christmas and may 2012 bring you all you ever wanted, and above all, happy cooking days!
making Christmas cards, buying gifts, decorating the house, deciding on a menu (although the past years it s been a yummy collaboration with my mom-in-law), well, you know how it is.
which is why this easy little sweet pot is such a joy to make, and to eat.
if you re a fan of cheesecakes, but don t want to make a whole cake and wait for it to cool until set, here s a solution:
LEMONY CHEESECAKE POTS WITH RASPBERRIES
INGREDIENTS:
100 gr digestive biscuits, crushed
30 gr butter, melted
300 gr Philadelphia cream cheese
3 tablespoons lemon curd
handful of fresh or frozen raspberries
1 tablespoon of sugar
METHOD:
1. mix the crushed bisuits with the melted butter and divide between little pots or ramekins (just to make a crust, as thin or as thick as you like) and leave to chill in the fridge until set
2. mix the cream cheese with the lemon curd and taste. adjust by either adding a little more lemon curd or sweeten with a little icing sugar
3. divide between the pots or ramekins and chill
4. heat the fresh or frozen raspberries with a little splash of water and the sugar until the fruit just collapses, leave to cool
5. when ready to serve, divide the raspberries between the pots and dive in ;-)
sweet and simple, but just that little bit indulgent, just enough to get one thru these crazy days.
in case i don t get to post before the end of this year, let me wish you a Merry Christmas and may 2012 bring you all you ever wanted, and above all, happy cooking days!
November 20, 2011
from Normandy to la dolce vita
saturday evening means:
not too much work in the kitchen, a good book or an interesting program on tv, and something quick and easy but very very tasty to munch on in the meantime... relaxation.
we recently discovered something that ticks all the boxes, altho purists might cringe a bit since we use herbs and flavorings more at home around the Mediterranean combined with a little cheese that comes from the north of France, closer to the Atlantic...
we still think it s a marriage made in heaven.
GRILLED CAMEMBERT IN ITS OWN BOX WITH HERBS, GARLIC AND OLIVE OIL
INGREDIENTS:
1 small whole camembert
2 sprigs of rosemary
a few sprigs of thyme
1 clove of garlic, sliced into thin slivers
a glug of olive oil
METHOD:
1. preheat the oven to 180°C
2. remove all the covering and check there s no sticker on the bottom of the cheese
4. make a few incisions in the cheese to put in the garlic slivers and herbs
5. put the cheese back into the wood case it came in
6. pour on a little glug of olive oil
7. roast on a hot baking tray for about 10-15 minutes until very soft to the touch
8. pour out a glass of white (or red) wine
9. tuck in with some crusty bread and perhaps some grilled paprikas
la dolce vita.
happy days.
not too much work in the kitchen, a good book or an interesting program on tv, and something quick and easy but very very tasty to munch on in the meantime... relaxation.
we recently discovered something that ticks all the boxes, altho purists might cringe a bit since we use herbs and flavorings more at home around the Mediterranean combined with a little cheese that comes from the north of France, closer to the Atlantic...
we still think it s a marriage made in heaven.
GRILLED CAMEMBERT IN ITS OWN BOX WITH HERBS, GARLIC AND OLIVE OIL
INGREDIENTS:
1 small whole camembert
2 sprigs of rosemary
a few sprigs of thyme
1 clove of garlic, sliced into thin slivers
a glug of olive oil
METHOD:
1. preheat the oven to 180°C
2. remove all the covering and check there s no sticker on the bottom of the cheese
4. make a few incisions in the cheese to put in the garlic slivers and herbs
5. put the cheese back into the wood case it came in
6. pour on a little glug of olive oil
7. roast on a hot baking tray for about 10-15 minutes until very soft to the touch
8. pour out a glass of white (or red) wine
9. tuck in with some crusty bread and perhaps some grilled paprikas
la dolce vita.
happy days.
October 23, 2011
sweetly tart
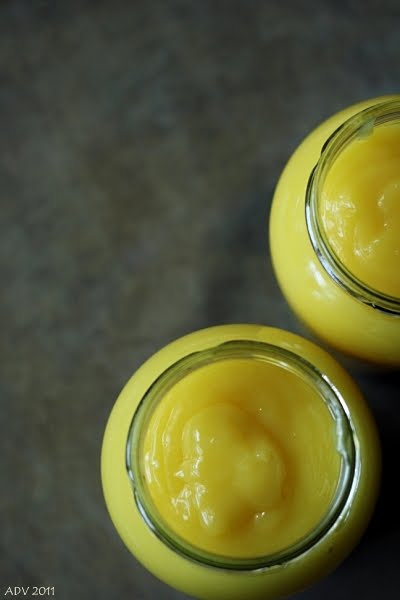
lemon curd.
sweetly tart and so easy to make it s almost a sin to use shop-bought, although i have often done so, probably because i thought it was going to be complicated.
but that s what happens when you have loads of other stuff to do. full-time job, taking evening classes, housework that needs to get done.
and then i found this recipe on the BBC food website. a couple of friends of mine had already told me it was simple to make, and they had sent me their recipe, but i d misplaced it and today i just had my mind set on making some.
i followed the recipe almost to a tee... except that i didn t quite let it cool down completely before potting, but i think it ll be alright (i hope).
and because i really don t have to add anything, or didn t even tweak amounts, i ll only show how it went in pics. please do take a look at the link and when you have 30 minutes to spare, have a go too.
you ll need 4 organic un-waxed lemons
4 eggs and 1 egg yolk
100 gr unsalted butter
200 gr fine caster sugar
all the zest from the 4 lemons
and all the juice too
melt the butter and the sugar with the lemon juice and the zest in a bowl over simmering water, then slowly add the beaten egg
after stirring constantly until it becomes like a thick custard, leave to cool before potting into sterilized jars
i really did get exactly the amount mentioned in the recipe, which is 2 x 250 gr pots.
hmmm, i think i ll be making some of my favorite cupcakes again soon, with lemon curd, ofcourse.
sweetly tart and so easy to make it s almost a sin to use shop-bought, although i have often done so, probably because i thought it was going to be complicated.
but that s what happens when you have loads of other stuff to do. full-time job, taking evening classes, housework that needs to get done.
and then i found this recipe on the BBC food website. a couple of friends of mine had already told me it was simple to make, and they had sent me their recipe, but i d misplaced it and today i just had my mind set on making some.
i followed the recipe almost to a tee... except that i didn t quite let it cool down completely before potting, but i think it ll be alright (i hope).
and because i really don t have to add anything, or didn t even tweak amounts, i ll only show how it went in pics. please do take a look at the link and when you have 30 minutes to spare, have a go too.
you ll need 4 organic un-waxed lemons
4 eggs and 1 egg yolk
100 gr unsalted butter
200 gr fine caster sugar
all the zest from the 4 lemons
and all the juice too
melt the butter and the sugar with the lemon juice and the zest in a bowl over simmering water, then slowly add the beaten egg
after stirring constantly until it becomes like a thick custard, leave to cool before potting into sterilized jars
i really did get exactly the amount mentioned in the recipe, which is 2 x 250 gr pots.
hmmm, i think i ll be making some of my favorite cupcakes again soon, with lemon curd, ofcourse.
September 24, 2011
those little signs of autumn
it s definitely here, the sun sits lower in the skies, the air smells faintly of a good wood fire being stoked to keep out the chill, the leaves are slowly turning and getting ready to provide us with a final spectacle of color, and the fruits of the season are at their best...
autumn.
apples and nuts, what better way to combine them with spices and sugar in a sticky yummy cake. being an avid fan of Delicious. magazine i was lucky to find a super recipe in the october 2011 issue to do just that. i did tweak it just a little bit. since i had no ground ginger, i substited by grating in some fresh ginger and just to make life easier, i used ground allspice berries which contain all those aromas of cloves and cinnamon and nutmeg.
so here it is:
STICKY APPLE PECAN AND GINGER CAKE
INGREDIENTS:
150 gr unsalted butter
150 gr soft dark brown muscovado sugar
150 gr golden syrup
200 ml milk
250 gr plain all-purpose flour
1.5 teaspoon ground allspice berries
2 cm piece of fresh ginger, grated
1.5 teaspoon baking powder
2 organic eggs, beaten
75 gr pecans, roughly chopped
2 pieces of candied stem ginger, chopped quite finely
2 crisp eating apples, peeled, cored and chopped into chunks
(about 250 gr when chopped)
METHOD:
1. preheat the oven to 180°C and prepare a 2 liter loaf tin (it really has to be this large because the cake does rise quite a bit) by greasing and lining with baking parchment
2. melt the butter, the sugar and syrup. once melted, add the milk and set aside to cool
3. sift the flour with the baking powder. add the ground allspice and the grated ginger
4. make a well in the center and slowly beat in the cooled sugar mixture
5. mix in the beaten eggs, chopped stem ginger, pecans and apple chunks
6. pour the mixture (it will be more fluid than a normal cake mix) into the prepared tin and bake in the oven for about 50 minutes or until a skewer inserted in the center comes out clean
7. cool in the tin for about 5 minutes and then lift out and leave to cool on a wire rack
8. can be served lukewarm or cold
9. once completely cooled, wrap in baking parchment and cling film and keep in an airtight tin for up to 5 days, the flavor will improve (or so it says in the magazine, but i doubt it ll survive that long!)
what can i say? i just had a slice with some cream mixed with a little bit of cream cheese... and it tastes of... well, all things nice like sugar and spice...
autumn.
autumn.
apples and nuts, what better way to combine them with spices and sugar in a sticky yummy cake. being an avid fan of Delicious. magazine i was lucky to find a super recipe in the october 2011 issue to do just that. i did tweak it just a little bit. since i had no ground ginger, i substited by grating in some fresh ginger and just to make life easier, i used ground allspice berries which contain all those aromas of cloves and cinnamon and nutmeg.
so here it is:
STICKY APPLE PECAN AND GINGER CAKE
INGREDIENTS:
150 gr unsalted butter
150 gr soft dark brown muscovado sugar
150 gr golden syrup
200 ml milk
250 gr plain all-purpose flour
1.5 teaspoon ground allspice berries
2 cm piece of fresh ginger, grated
1.5 teaspoon baking powder
2 organic eggs, beaten
75 gr pecans, roughly chopped
2 pieces of candied stem ginger, chopped quite finely
2 crisp eating apples, peeled, cored and chopped into chunks
(about 250 gr when chopped)
METHOD:
1. preheat the oven to 180°C and prepare a 2 liter loaf tin (it really has to be this large because the cake does rise quite a bit) by greasing and lining with baking parchment
2. melt the butter, the sugar and syrup. once melted, add the milk and set aside to cool
3. sift the flour with the baking powder. add the ground allspice and the grated ginger
4. make a well in the center and slowly beat in the cooled sugar mixture
5. mix in the beaten eggs, chopped stem ginger, pecans and apple chunks
6. pour the mixture (it will be more fluid than a normal cake mix) into the prepared tin and bake in the oven for about 50 minutes or until a skewer inserted in the center comes out clean
7. cool in the tin for about 5 minutes and then lift out and leave to cool on a wire rack
8. can be served lukewarm or cold
9. once completely cooled, wrap in baking parchment and cling film and keep in an airtight tin for up to 5 days, the flavor will improve (or so it says in the magazine, but i doubt it ll survive that long!)
what can i say? i just had a slice with some cream mixed with a little bit of cream cheese... and it tastes of... well, all things nice like sugar and spice...
autumn.
August 28, 2011
cakes... savory and sweet
cakes... how many different recipes are there? i have absolutely no idea, but i m guessing hundreds, if not more.
there are the classics; like Victoria sponges, pound cakes, angel food cakes, devil food cakes, chocolate cakes, fruit and nut cakes, full on or gluten-free... oh, i could go on and on.
and i m sure every country, every family, every grandmother, mother, daughter (and let s be fair, granddad, father, and son) has a special favorite recipe.
i haven t found my absolute top cake yet... but that means i get to bake and bake until i do, yay!
we ve been having a very fitful summer, a true 'kwakkelzomer' as we often say in Belgium.
so baking something with summery ingredients and flavors can actually bring the sun into the house.
just like this recipe which i adapted from the july-august 2011 edition of Saveurs.
COURGETTE CAKE WITH FETA, MINT AND PINE NUTS
INGREDIENTS:
1 large courgette
100 gr feta cheese
2 eggs
150 gr self-raising flour
1 teaspoon baking powder
50 ml olive oil
50 gr pine nuts
handful of mint leaves, chopped at the last minute
salt and pepper
METHOD:
1. pre-heat the oven to 180°C and prepare a long cake tin by buttering and lightly flouring it, or lining with baking parchment
2. grate the courgette, sprinkle with salt, and leave to drain for about half an hour
3. sift the flour and baking powder into a bowl and beat in the eggs and the olive oil
4. squeeze out the grated courgette and mix into the batter
5. crumble in the feta cheese, add the pine nuts and chopped mint and mix lightly
6. season with salt and pepper
7. put the mixture into the cake tin and bake for about 50 minutes or until a skewer inserted in the middle comes out clean
8. leave to cool slightly in the tin before taking it out.
9. can be eaten lukewarm or cool
perfect for a light lunch!
...
now for a little indulgence.
last week, i went to my friend Alina s teahouse, My Cup of Tea, in the middle of Antwerp, and had a slice of her signature cake. WOW, wow, wow...
if you re a fan of Nutella or any other hazelnut chocolate spread, this is one for you.
Alina kindly let me copy the recipe, which came from a little book called 'Taart, Cake & Muffins' which was translated from '101 Cakes & Bakes' by Mary Cadogan...
enough said, here it is, definitely a recipe to be shared, it s just too scrumptious.
NUTELLA AND CINNAMON CAKE
INGREDIENTS:
175 gr unsalted butter
90 gr fine white caster sugar
85 gr dark brown sugar (for a richer flavor and moister texture)
3 eggs
4 tablespoons milk
200 gr self-raising flour
1 teaspoon baking powder, optional
2 teaspoons ground cinnamon
3-4 rounded tablespoons Nutella or other hazelnut chocolate spread
50 gr hazelnuts, chopped (i used pecans because i didn t have the hazelnuts)
METHOD:
1. pre-heat the oven to 175-180°C and prepare a 20-22 cm round cake tin
2. if you have a KitchenAid or Magimix mixer (or any such mixer), just put everything (EXCEPT the Nutella and the nuts) into the bowl at once, start mixing on slow, then add a few notches to the speed and mix until very light and fluffy...
3. however, i only have an electric hand-held mixer, so i first softened the butter, added the sugar and started beating until that was quite creamy and fluffy
4. one by one, i added the eggs and then the milk
5. once that was well beaten, i sifted in the flour, the baking powder and the cinnamon and mixed again until it was really quite light
6. i then added the nuts
7. then i filled the cake tin about 2/3 full and gently distributed the 3-4 tablespoons of Nutella on top of that
8. finish with the rest of the cake batter
9. bake for about 50 minutes or until a skewer inserted in the middle comes out clean
10. leave to cool before serving (which i did with a drizzle of cream...)
more-ish!
and now i shall continue on my quest, i don t care if i ever find the holy grail, the journey itself will be fun enough.
there are the classics; like Victoria sponges, pound cakes, angel food cakes, devil food cakes, chocolate cakes, fruit and nut cakes, full on or gluten-free... oh, i could go on and on.
and i m sure every country, every family, every grandmother, mother, daughter (and let s be fair, granddad, father, and son) has a special favorite recipe.
i haven t found my absolute top cake yet... but that means i get to bake and bake until i do, yay!
we ve been having a very fitful summer, a true 'kwakkelzomer' as we often say in Belgium.
so baking something with summery ingredients and flavors can actually bring the sun into the house.
just like this recipe which i adapted from the july-august 2011 edition of Saveurs.
COURGETTE CAKE WITH FETA, MINT AND PINE NUTS
INGREDIENTS:
1 large courgette
100 gr feta cheese
2 eggs
150 gr self-raising flour
1 teaspoon baking powder
50 ml olive oil
50 gr pine nuts
handful of mint leaves, chopped at the last minute
salt and pepper
METHOD:
1. pre-heat the oven to 180°C and prepare a long cake tin by buttering and lightly flouring it, or lining with baking parchment
2. grate the courgette, sprinkle with salt, and leave to drain for about half an hour
3. sift the flour and baking powder into a bowl and beat in the eggs and the olive oil
4. squeeze out the grated courgette and mix into the batter
5. crumble in the feta cheese, add the pine nuts and chopped mint and mix lightly
6. season with salt and pepper
7. put the mixture into the cake tin and bake for about 50 minutes or until a skewer inserted in the middle comes out clean
8. leave to cool slightly in the tin before taking it out.
9. can be eaten lukewarm or cool
perfect for a light lunch!
...
now for a little indulgence.
last week, i went to my friend Alina s teahouse, My Cup of Tea, in the middle of Antwerp, and had a slice of her signature cake. WOW, wow, wow...
if you re a fan of Nutella or any other hazelnut chocolate spread, this is one for you.
Alina kindly let me copy the recipe, which came from a little book called 'Taart, Cake & Muffins' which was translated from '101 Cakes & Bakes' by Mary Cadogan...
enough said, here it is, definitely a recipe to be shared, it s just too scrumptious.
NUTELLA AND CINNAMON CAKE
INGREDIENTS:
175 gr unsalted butter
90 gr fine white caster sugar
85 gr dark brown sugar (for a richer flavor and moister texture)
3 eggs
4 tablespoons milk
200 gr self-raising flour
1 teaspoon baking powder, optional
2 teaspoons ground cinnamon
3-4 rounded tablespoons Nutella or other hazelnut chocolate spread
50 gr hazelnuts, chopped (i used pecans because i didn t have the hazelnuts)
METHOD:
1. pre-heat the oven to 175-180°C and prepare a 20-22 cm round cake tin
2. if you have a KitchenAid or Magimix mixer (or any such mixer), just put everything (EXCEPT the Nutella and the nuts) into the bowl at once, start mixing on slow, then add a few notches to the speed and mix until very light and fluffy...
3. however, i only have an electric hand-held mixer, so i first softened the butter, added the sugar and started beating until that was quite creamy and fluffy
4. one by one, i added the eggs and then the milk
5. once that was well beaten, i sifted in the flour, the baking powder and the cinnamon and mixed again until it was really quite light
6. i then added the nuts
7. then i filled the cake tin about 2/3 full and gently distributed the 3-4 tablespoons of Nutella on top of that
8. finish with the rest of the cake batter
9. bake for about 50 minutes or until a skewer inserted in the middle comes out clean
10. leave to cool before serving (which i did with a drizzle of cream...)
more-ish!
and now i shall continue on my quest, i don t care if i ever find the holy grail, the journey itself will be fun enough.
August 17, 2011
from west to east
a while ago, on Facebook, a friend of mine wrote about discovering culinary Turkey.
i ve been interested in 'mediterranean' cooking for quite some time now. not only Spanish, or Italian, or Greek... but, thinking about it, as Rick Stein so aptly described on one of his tv-shows: Mediterranean Escapes, this encompasses a vast vast area from Spain, Southern France, Italy, Greece, to Turkey, Syria, Lebanon, Israel, then Egypt, Libya, Tunisia, Algeria, and Morocco...! if you think about all the different food cultures, it s just mind-boggling.
of course, that mind-boggling aspect could be applied to just one country like India, or the whole of South-East Asia, and the different food cultures in China, Korea and Japan too.
however, i m not an expert, i just like to cook. and i m fascinated by spices and herbs and how people use the ones available to them to turn basic ingredients such as breads, yoghurts, vegetables, meats, etc. into something exciting.
i found a recipe for labne in one of my favorite cookery magazines and wanted to try making it. then i found a recipe for flatbreads with thyme, cheese and honey, and i had been wanting to make a very simple and delicious Moroccan carrot salad too... so i combined the three for a light supper.
LABNE:
INGREDIENTS:
300 gr natural Greek yoghurt
1 large clove of garlic, crushed with a little salt (this is optional)
cheese cloth
fine mesh sieve
METHOD:
mix the garlic with the yoghurt and strain through the cheesecloth and sieve for about 6-8 hours or longer for a firmer consistency.
add whatever herbs u like to make a dip. i added chopped parsley, mint, coriander and some za'atar and olive oil.
THE EASIEST FLATBREADS:
(adapted from a recipe i found on the Smitten Kitchen blog)
INGREDIENTS:
1 3/4 (220 gr) cup of plain flour
1 teaspoon baking powder
3/4 teaspoon salt
1/2 cup (120 ml) water
1/3 cup (80 ml) olive oil
METHOD:
sieve the flour, baking powder and salt into a large bowl.
mix in the water and the olive oil.
knead well until it becomes an elastic dough (it will feel very oily, but you won t taste that once baked).
divide the dough into four balls and roll out to rough naan-shaped breads.
bake on a baking-paper lined baking sheet at 230°C for about 10-12 minutes until golden.
please do read the post on Smitten Kitchen, because here i diverted from her recipe, and instead of using the thyme and honey and the cheese, i opted for, you guessed it, a sprinkling of za'atar and sumac.
MOROCCAN CARROT SALAD:
INGREDIENTS:
about 8 to 10 medium-sized carrots
pepper and salt
a good handful of parsley, chopped
2 cloves of garlic, crushed
4 teaspoons pimentón (i used the picante or spicy one)
2 teaspoon cumin seeds (i lightly roasted and crushed them)
vinegar and olive oil
METHOD:
i took the easy road and peeled and sliced the carrots, then steamed them in a covered bowl in the microwave for about 8-10 minutes until al dente.
then i just very lightly mashed them with the garlic, the parsley (and also some chopped coriander because i love it), the spices and added vinegar and olive oil to taste. it should taste lightly sweet and sour.
Bismillah!
i think i will be travelling from west to east more often.
i ve been interested in 'mediterranean' cooking for quite some time now. not only Spanish, or Italian, or Greek... but, thinking about it, as Rick Stein so aptly described on one of his tv-shows: Mediterranean Escapes, this encompasses a vast vast area from Spain, Southern France, Italy, Greece, to Turkey, Syria, Lebanon, Israel, then Egypt, Libya, Tunisia, Algeria, and Morocco...! if you think about all the different food cultures, it s just mind-boggling.
of course, that mind-boggling aspect could be applied to just one country like India, or the whole of South-East Asia, and the different food cultures in China, Korea and Japan too.
however, i m not an expert, i just like to cook. and i m fascinated by spices and herbs and how people use the ones available to them to turn basic ingredients such as breads, yoghurts, vegetables, meats, etc. into something exciting.
i found a recipe for labne in one of my favorite cookery magazines and wanted to try making it. then i found a recipe for flatbreads with thyme, cheese and honey, and i had been wanting to make a very simple and delicious Moroccan carrot salad too... so i combined the three for a light supper.
LABNE:
INGREDIENTS:
300 gr natural Greek yoghurt
1 large clove of garlic, crushed with a little salt (this is optional)
cheese cloth
fine mesh sieve
METHOD:
mix the garlic with the yoghurt and strain through the cheesecloth and sieve for about 6-8 hours or longer for a firmer consistency.
add whatever herbs u like to make a dip. i added chopped parsley, mint, coriander and some za'atar and olive oil.
THE EASIEST FLATBREADS:
(adapted from a recipe i found on the Smitten Kitchen blog)
INGREDIENTS:
1 3/4 (220 gr) cup of plain flour
1 teaspoon baking powder
3/4 teaspoon salt
1/2 cup (120 ml) water
1/3 cup (80 ml) olive oil
METHOD:
sieve the flour, baking powder and salt into a large bowl.
mix in the water and the olive oil.
knead well until it becomes an elastic dough (it will feel very oily, but you won t taste that once baked).
divide the dough into four balls and roll out to rough naan-shaped breads.
bake on a baking-paper lined baking sheet at 230°C for about 10-12 minutes until golden.
please do read the post on Smitten Kitchen, because here i diverted from her recipe, and instead of using the thyme and honey and the cheese, i opted for, you guessed it, a sprinkling of za'atar and sumac.
MOROCCAN CARROT SALAD:
INGREDIENTS:
about 8 to 10 medium-sized carrots
pepper and salt
a good handful of parsley, chopped
2 cloves of garlic, crushed
4 teaspoons pimentón (i used the picante or spicy one)
2 teaspoon cumin seeds (i lightly roasted and crushed them)
vinegar and olive oil
METHOD:
i took the easy road and peeled and sliced the carrots, then steamed them in a covered bowl in the microwave for about 8-10 minutes until al dente.
then i just very lightly mashed them with the garlic, the parsley (and also some chopped coriander because i love it), the spices and added vinegar and olive oil to taste. it should taste lightly sweet and sour.
Bismillah!
i think i will be travelling from west to east more often.
July 24, 2011
black cherry and marrons glacés ice-cream
it had to happen.
for the whole duration of my short holiday, it kept raining on and off. not much else to do but go on a cooking spree ofcourse.
we did go to Maastricht in The Netherlands for a day-trip, and there we found a beautiful little ice-cream parlor serving the most incredible flavored ice-creams we had ever tasted.
here s Sam who couldn t wipe the smile off his face with his gelato di fragole e limone.
the next day, i just couldn t help myself. i had to make some of my own ice-cream again. a few years ago, i had received an ice-cream maker for my birthday from Sam s mom. and every summer i had made different flavored ice-creams, pretty classical ones like vanilla and chocolate and mocha, as well as green tea and black sesame flavored ones.
but this time i wanted to make something just a little bit different. i had bought a packet of marrons glacés (candied chestnuts) in Cassel, France, and i also had a few black cherries left in the fridge.
so i chopped up a few marrons. and lightly simmered a few pitted cherries. made a vanilla flavored ice-cream base. mixed and churned. and it turned out beautifully.
BLACK CHERRY AND MARRONS GLACÉS ICE-CREAM:
INGREDIENTS:
(for about 500ml)
FOR THE VANILLA BASE:
125 ml milk, preferably full-fat
tiny pinch of salt
75 gr fine white caster sugar
1 vanilla bean
3 egg-yolks
250 ml cream
TO ADD:
3 or 4 marrons glacés, chopped
10 black cherries, halved and pitted
METHOD:
1. heat the milk, the sugar, the vanilla bean (halved lengthways), the pinch of salt, until the sugar has dissolved.
2. cover and leave to infuse for about an hour.
3. beat the egg-yolks, re-heat the milk slightly and add slowly to the yolks.
4. return to the saucepan, and over a low heat, keep stirring until you get a slightly thick custard.
5. cool and add to the cream.
6. leave to cool completely, preferably overnight in the fridge.
7. meanwhile, heat the cherry halves in a little bit of water and sugar until softened. leave to cool.
8. strain the custard through a fine-mesh sieve and pour into your ice-cream maker and churn according to machine instructions.
9. halfway through churning, add the chopped marrons and the cherries.
10. churn until ready, put into a plastic container, cover and freeze completely.
11. to serve, take the ice-cream out of the freezer and let it soften slightly so it can be easily scooped.
should you not have an ice-cream maker, pour the mixture into a plastic container and freeze. every two hours, beat the mixture and also add the marrons and cherries halfway through. then mix again until completely frozen.
again, a little bit different, but nice anyway.
for the whole duration of my short holiday, it kept raining on and off. not much else to do but go on a cooking spree ofcourse.
we did go to Maastricht in The Netherlands for a day-trip, and there we found a beautiful little ice-cream parlor serving the most incredible flavored ice-creams we had ever tasted.
here s Sam who couldn t wipe the smile off his face with his gelato di fragole e limone.
the next day, i just couldn t help myself. i had to make some of my own ice-cream again. a few years ago, i had received an ice-cream maker for my birthday from Sam s mom. and every summer i had made different flavored ice-creams, pretty classical ones like vanilla and chocolate and mocha, as well as green tea and black sesame flavored ones.
but this time i wanted to make something just a little bit different. i had bought a packet of marrons glacés (candied chestnuts) in Cassel, France, and i also had a few black cherries left in the fridge.
so i chopped up a few marrons. and lightly simmered a few pitted cherries. made a vanilla flavored ice-cream base. mixed and churned. and it turned out beautifully.
BLACK CHERRY AND MARRONS GLACÉS ICE-CREAM:
INGREDIENTS:
(for about 500ml)
FOR THE VANILLA BASE:
125 ml milk, preferably full-fat
tiny pinch of salt
75 gr fine white caster sugar
1 vanilla bean
3 egg-yolks
250 ml cream
TO ADD:
3 or 4 marrons glacés, chopped
10 black cherries, halved and pitted
METHOD:
1. heat the milk, the sugar, the vanilla bean (halved lengthways), the pinch of salt, until the sugar has dissolved.
2. cover and leave to infuse for about an hour.
3. beat the egg-yolks, re-heat the milk slightly and add slowly to the yolks.
4. return to the saucepan, and over a low heat, keep stirring until you get a slightly thick custard.
5. cool and add to the cream.
6. leave to cool completely, preferably overnight in the fridge.
7. meanwhile, heat the cherry halves in a little bit of water and sugar until softened. leave to cool.
8. strain the custard through a fine-mesh sieve and pour into your ice-cream maker and churn according to machine instructions.
9. halfway through churning, add the chopped marrons and the cherries.
10. churn until ready, put into a plastic container, cover and freeze completely.
11. to serve, take the ice-cream out of the freezer and let it soften slightly so it can be easily scooped.
should you not have an ice-cream maker, pour the mixture into a plastic container and freeze. every two hours, beat the mixture and also add the marrons and cherries halfway through. then mix again until completely frozen.
again, a little bit different, but nice anyway.
July 17, 2011
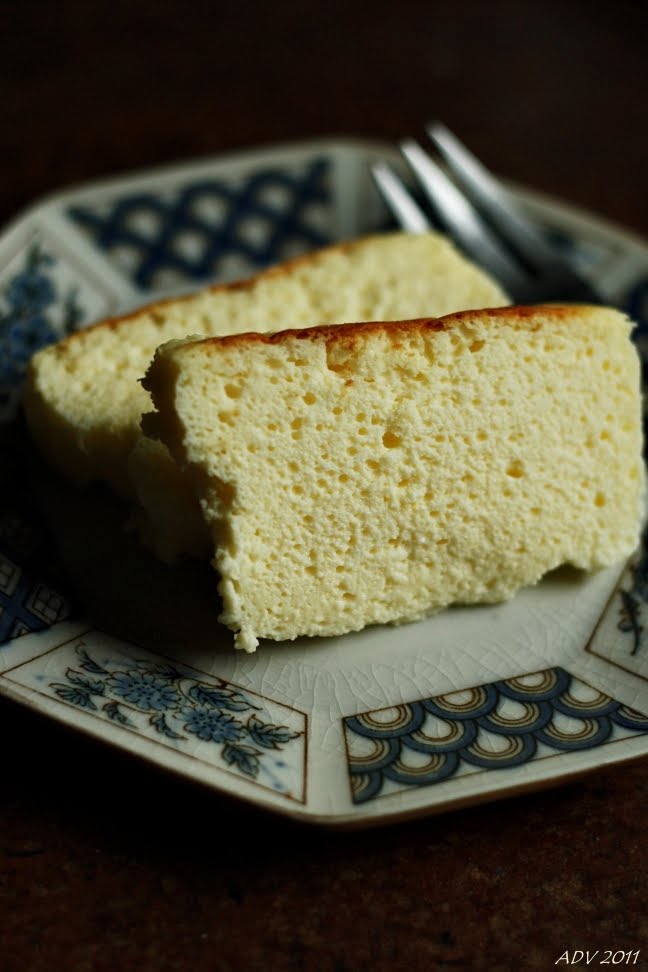
fuwafuwa Japanese cheesecake... *sigh*
are you also one of those people who are just rendered speechless when you have something so good to eat, something that evokes so many emotions, like me?
remember the scene in 'Friends' where Chandler and Rachel cannot seem to say goodbye to the cheesecake? well, i m sure that cheesecake, probably the (in)famous New York style one, is totally amazing.
i ve made a few, not many, cheesecakes in my lifetime, always to an American recipe which called for a buttery biscuit crust, loads of extra cream, and often some kind of fruity coulis on top. (which reminds me, yesterday i was flicking thru the pages of my old cookery notebook from high school, and i actually found a cheesecake recipe that supposedly was one by L.B.J... uhm, Lyndon B. Johnson to the younger ones amongst you! well, more probably it was his wife s, but anyway...)
a few months ago, around Easter, on one of my favorite blogs, i found a recipe for Japanese cheesecake. ofcourse i was immediately intrigued. would anybody have found the perfect recipe for that light, yet creamy, fluffy yet dense enough, yummy scrumptious cheesecake that i remembered of my teenage years?
so i made it yesterday.
OH... MY... GOD...
forgive me for waxing lyrical, but this was just like heaven. seriously.
JAPANESE CHEESECAKE:
adapted and tweaked (just a little bit) from GREEN CILANTRO
INGREDIENTS:
300 gr cream cheese (i did use the Phildelphia brand)
45 gr unsalted butter
3 egg yolks
20 gr white caster sugar
11 gr cornstarch
150 gr milk (yes, weigh the milk)
3 egg whites
55 gr white caster sugar
METHOD:
1. pre-heat the oven to 180°C
2. instead of using a round 18cm cake tin, i opted for a loaf tin (26cm x 10cm x 7cm) and lined that with baking paper (making sure that the paper rose a good 2cm above the sides of the tin)
3. i softened (not heated) the cream cheese in the microwave (750w at 10 minute intervals)
4. melt the butter au-bain-marie and mix well with the softened cream cheese
5. mix the egg yolks with the sugar and the sifted cornstarch
6. heat the milk and, just before boiling, slowly add to the egg-yolk mixture and beat this mixture also au-bain-marie until thickened (i nearly botched it up here, left the bowl with egg-yolk mixture over the hot water while i went on to prepare something else, and it nearly became a steamed omelet!... so watch it and remove from heat as soon as thickened)
7. mix the egg-yolk mixture with the cream cheese mixture (i was able to save the whole thing by running it thru a fine-mesh sieve, yay)
8. beat the egg-whites (which i did not lightly freeze, but only chilled in the fridge while making the other preparations) with a small amount of the 55gr of sugar until frothy, then add more of the sugar and beat until it is a creamy meringue.
9. combine this with the egg-yolk cream cheese mixture.
10. pour into the prepared tin
11. place this tin in a roasting pan and add hot water until it comes up about 1-1.5cm of the sides of the cake tin
12. bake for 15 minutes
13. lower the temperature to 160°C and continue to bake for 25 minutes or until the top is slightly golden
14. TURN OFF THE OVEN and leave the tin inside for another 40 minutes to an hour
15. take the tin out of the oven and leave to cool completely before putting it in the fridge to settle completely, preferably overnight.
i couldn t wait that long, so had to try it after a good 8 hours of chilling.
again.
WOW.
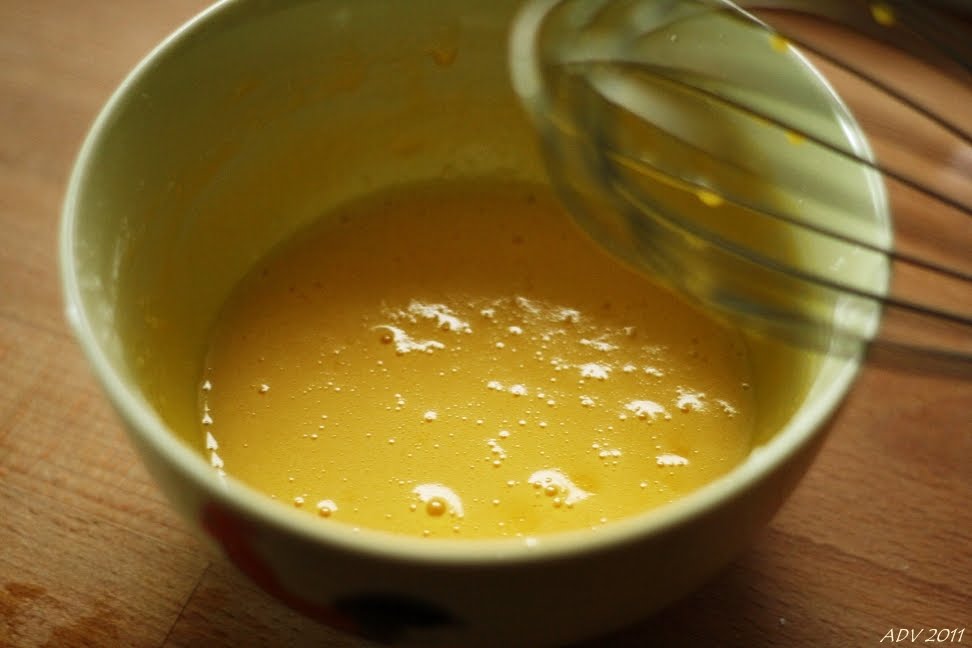
the egg yolks with the cornflour
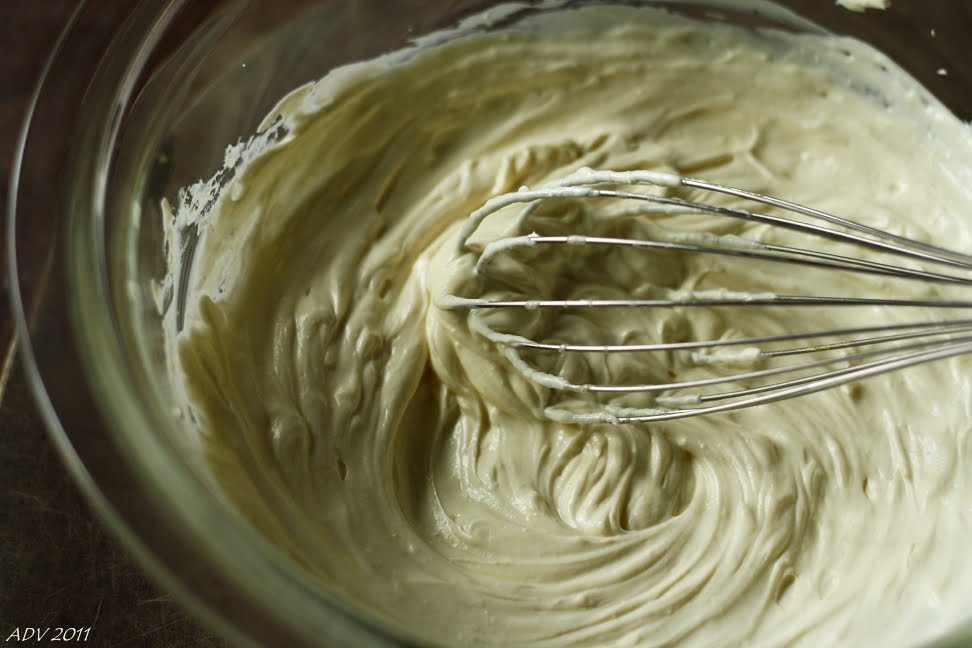
the cream cheese with the butter
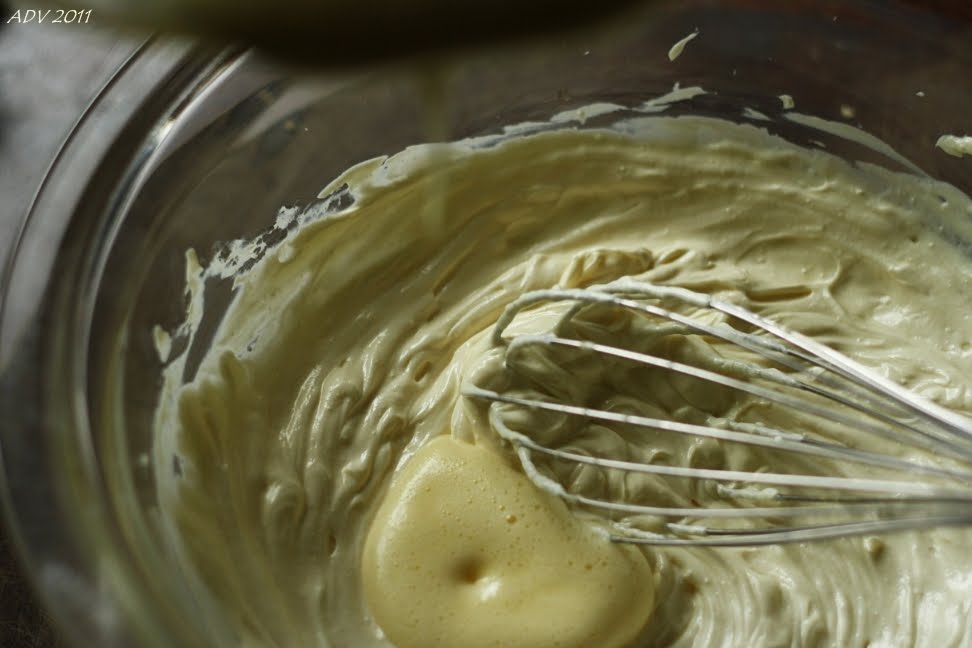
egg-yolk mixture with the cream cheese mixture
adding the meringue
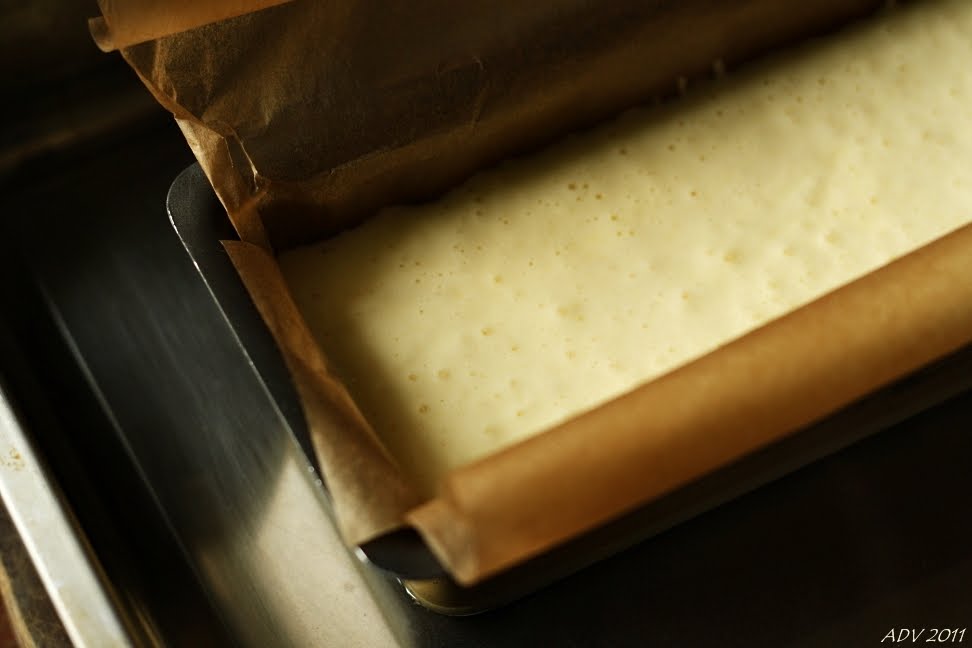
ready for the oven
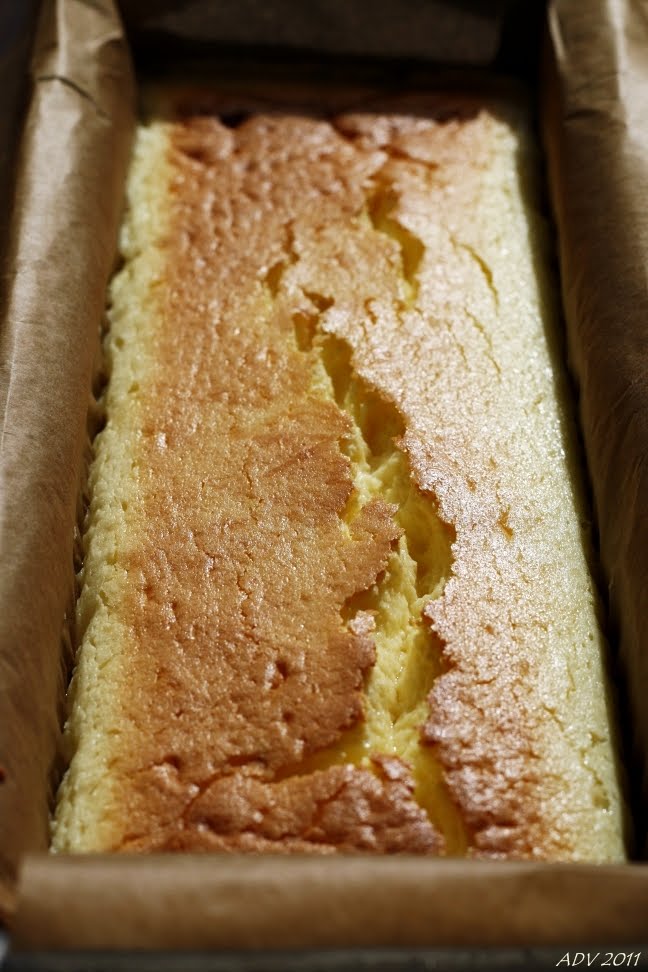
just cracked a little (next time must adjust oven temp)
Viv, if you re reading this, THANK YOU!!!
remember the scene in 'Friends' where Chandler and Rachel cannot seem to say goodbye to the cheesecake? well, i m sure that cheesecake, probably the (in)famous New York style one, is totally amazing.
i ve made a few, not many, cheesecakes in my lifetime, always to an American recipe which called for a buttery biscuit crust, loads of extra cream, and often some kind of fruity coulis on top. (which reminds me, yesterday i was flicking thru the pages of my old cookery notebook from high school, and i actually found a cheesecake recipe that supposedly was one by L.B.J... uhm, Lyndon B. Johnson to the younger ones amongst you! well, more probably it was his wife s, but anyway...)
a few months ago, around Easter, on one of my favorite blogs, i found a recipe for Japanese cheesecake. ofcourse i was immediately intrigued. would anybody have found the perfect recipe for that light, yet creamy, fluffy yet dense enough, yummy scrumptious cheesecake that i remembered of my teenage years?
so i made it yesterday.
OH... MY... GOD...
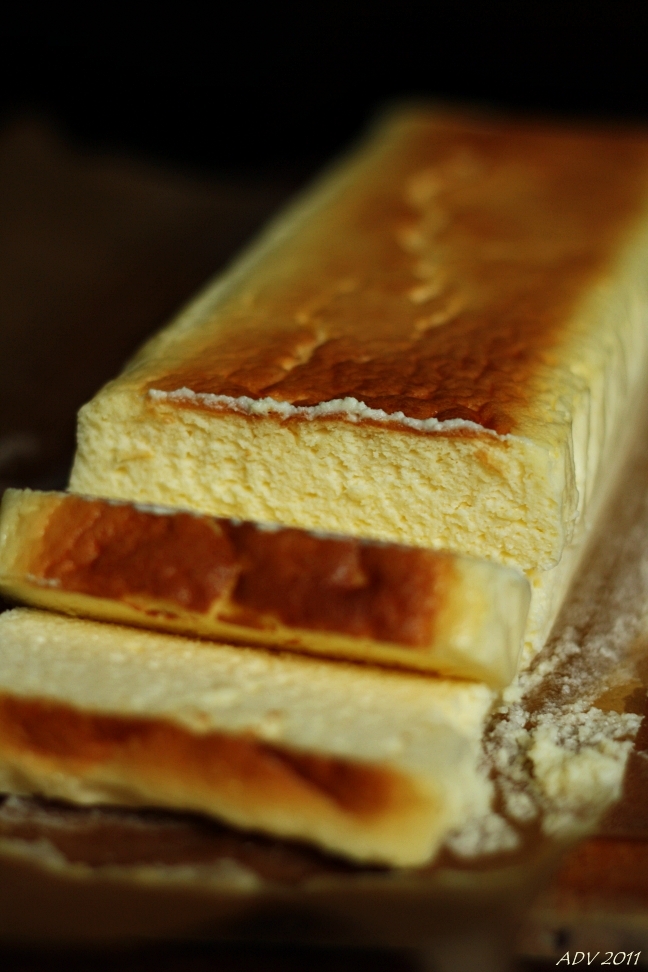
forgive me for waxing lyrical, but this was just like heaven. seriously.
JAPANESE CHEESECAKE:
adapted and tweaked (just a little bit) from GREEN CILANTRO
INGREDIENTS:
300 gr cream cheese (i did use the Phildelphia brand)
45 gr unsalted butter
3 egg yolks
20 gr white caster sugar
11 gr cornstarch
150 gr milk (yes, weigh the milk)
3 egg whites
55 gr white caster sugar
METHOD:
1. pre-heat the oven to 180°C
2. instead of using a round 18cm cake tin, i opted for a loaf tin (26cm x 10cm x 7cm) and lined that with baking paper (making sure that the paper rose a good 2cm above the sides of the tin)
3. i softened (not heated) the cream cheese in the microwave (750w at 10 minute intervals)
4. melt the butter au-bain-marie and mix well with the softened cream cheese
5. mix the egg yolks with the sugar and the sifted cornstarch
6. heat the milk and, just before boiling, slowly add to the egg-yolk mixture and beat this mixture also au-bain-marie until thickened (i nearly botched it up here, left the bowl with egg-yolk mixture over the hot water while i went on to prepare something else, and it nearly became a steamed omelet!... so watch it and remove from heat as soon as thickened)
7. mix the egg-yolk mixture with the cream cheese mixture (i was able to save the whole thing by running it thru a fine-mesh sieve, yay)
8. beat the egg-whites (which i did not lightly freeze, but only chilled in the fridge while making the other preparations) with a small amount of the 55gr of sugar until frothy, then add more of the sugar and beat until it is a creamy meringue.
9. combine this with the egg-yolk cream cheese mixture.
10. pour into the prepared tin
11. place this tin in a roasting pan and add hot water until it comes up about 1-1.5cm of the sides of the cake tin
12. bake for 15 minutes
13. lower the temperature to 160°C and continue to bake for 25 minutes or until the top is slightly golden
14. TURN OFF THE OVEN and leave the tin inside for another 40 minutes to an hour
15. take the tin out of the oven and leave to cool completely before putting it in the fridge to settle completely, preferably overnight.
i couldn t wait that long, so had to try it after a good 8 hours of chilling.
again.
WOW.
the egg yolks with the cornflour
the cream cheese with the butter
egg-yolk mixture with the cream cheese mixture
adding the meringue
ready for the oven
just cracked a little (next time must adjust oven temp)
Viv, if you re reading this, THANK YOU!!!
Subscribe to:
Posts (Atom)